Step 1: Getting Started to start a blog

When you first decide to start a blog, it can be overwhelming. There is a lot of information out there and it’s important to understand the basics before diving in. This post will cover the basics of what a blog is, how to select a niche, choosing a domain and hosting provider, and any extra considerations that will help you on getting started to start a blog.
What is a Blog?
Blogging is an exciting way to share your unique voice with the world! You can create posts, articles, and other content on a website or web page that will be available online for anybody to read. It doesn’t matter whether you prefer writing text-based pieces, uploading pictures or videos – blogging offers plenty of opportunities for sharing whatever it is that inspires you most. Engaging with readers through comments, polls and events also adds another layer of dynamism to this activity – so why not give it a try?
Selecting a Niche
When selecting a niche for your blog, it is important to think about what topics you would like to write about and if you can make profit from it. Think of subjects that interest and excite you, as well as those your target audience may be interested in. Your niche can also help inform the “tone” of your blog – for example, if your writing style is humorous, an appropriate niche could be comedic reviews. Once you have settled on a niche, research potential keywords and topics that relate to it.
Choosing a Domain and Hosting Provider
Picking the right domain name and hosting provider is an essential second step after deciding on your niche. To put it in a more tangible perspective, think of the house (the physical location where files are stored) being analogous to the hosting, while its address (www.yoursite.com) would be representative of the domain name you choose for your blog site. Your perfect domain should stand out from others by reflecting what your website’s content will involve, but also remain short and easy to remember as well as spell correctly – so keep it brief! Lastly make sure that it’s still available too before making any final decisions!
Highlights to choose a domain name:
- Your domain name should be unique, reflective of your blog’s content, memorable and easy to spell.
- It should also be as short as possible.
- It has to be available
Ready to learn the ins and outs of naming your blog? Click here for a comprehensive guide that will help you make an informed decision.
There are several hosting providers available, however, I strongly suggest Bluehost. It has consistently displayed dependable uptime and remarkable customer support throughout my two years working with them. With competitive prices and an excellent service record, you can feel confident entrusting your domains or websites to this well-established resource. Don’t take it from me–experience for yourself why countless consumers trust Bluehost for their hosting solutions!
Guide to buy a domain and hosting on Bluehost
Bluehost is one of the top hosting providers, offering a wide range of services for bloggers. With reliable uptime and friendly customer service, it’s easy to see why so many people trust Bluehost for their hosting needs. In this guide, we’ll walk you through the process of buying a domain and hosting on Bluehost.
Step 1: Visit the Bluehost website
Visit the Bluehost website to begin the process of buying a domain and hosting package. Click on Hosting & Websites > Shared Hosting to begin creating your account.

Step 2: Select your hosting plan
Once you’ve created an account, you can begin selecting the hosting package that best fits your needs. Bluehost offers a variety of packages, ranging from the Basic plan to the Pro plan. I strongly suggest the Basic or Plus plan.

Step 3: Choose your domain name
After selecting a hosting package, you can choose your domain name. Bluehost gives you the option to search for an existing domain name or register a new one. If you register a new one, you can choose from the various domain extensions such as .com, .net, or .org.

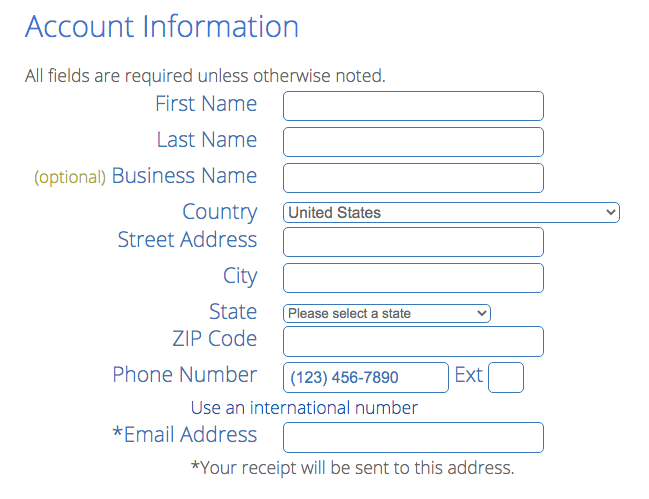
Step 4: Fill in your personal information
Once you’ve selected a domain name, it’s time to fill in your personal information. This includes filling out your address, phone number, and other contact details. Once you’ve filled in the required fields, you can then proceed to the payment page.
Step 5: Choose package extras
Before proceeding to the payment page, you have the option of choosing package extras. These include additional features such as website backups and domain privacy protection. All the package extras are optional.

Step 6: Complete the purchase
Once you’ve chosen your package extras, you can then proceed to the payment page. Here, you can choose your payment method and complete the purchase of your domain name and hosting package.
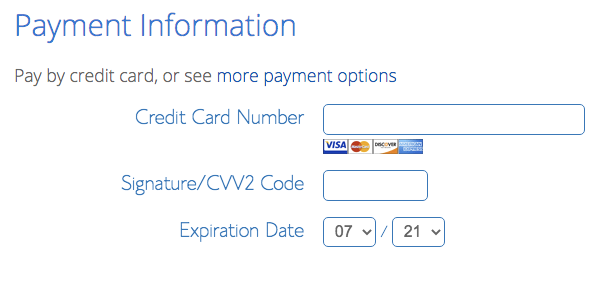
Don’t forget to read and agree to terms at the bottom and then click Submit to complete your purchase.
Congratulations! You’ve now successfully purchased your domain and hosting package on Bluehost. If you ever need help with any aspect of setting up your new website, Bluehost’s customer service is only a click away.
Conclusion
With these steps you are getting started to start a blog. Now you’ll need to proceed to create the blog itself. Please continue to Step 2 of this series.